 B2BROKER
 B2CORE
 B2CORE IB
 B2TRADER
 B2CONNECT
 B2TRANSLATE
 B2BINPAY
 B2BROKER
How to migrate to the new registration settings
Learn how to move from Registration wizards to the new registration settings and custom fields to build the client registration process in the B2CORE UI
Since the middle of July 2026, B2CORE provides new registration settings that replace Registration wizards. The new registration settings work together with custom fields, so you can build a registration process tailored to your needs — from a simple form with an email address and a password to a multi-step process with custom fields.
The new registration settings are more flexible and easier to maintain than Registration wizards and the Advanced Data step, which were built for tech-savvy users and were harder to support.
If you have mobile applications, do not turn off or delete the existing Registration wizards. End users with older app versions installed cannot register without them. We will monitor the usage of the Registration wizards and remove them in a future release, so keep them as is for now.
Migration overview
To migrate to the new registration settings, complete the following steps:
- Optionally, set up custom fields for any information you want to collect beyond the standard profile fields.
- Create a registration profile in System > Registration and configure its fields, options, terms, and custom fields.
- Enable the registration profile and verify the registration process in the B2CORE UI.
Step 1. Set up custom fields (optional)
Complete this step only if your registration process requires information beyond the standard fields. To collect standard fields alone, such as an email address, a password, and a phone number, skip to Step 2.
To manage custom fields, navigate to System > Custom Fields. This menu contains two pages:
- Groups — sections that organize related fields, such as Personal Information, Tax Information, or Economic Profile.
- Fields — the individual fields, each belonging to a group and defined with a type, a label, and validation rules.
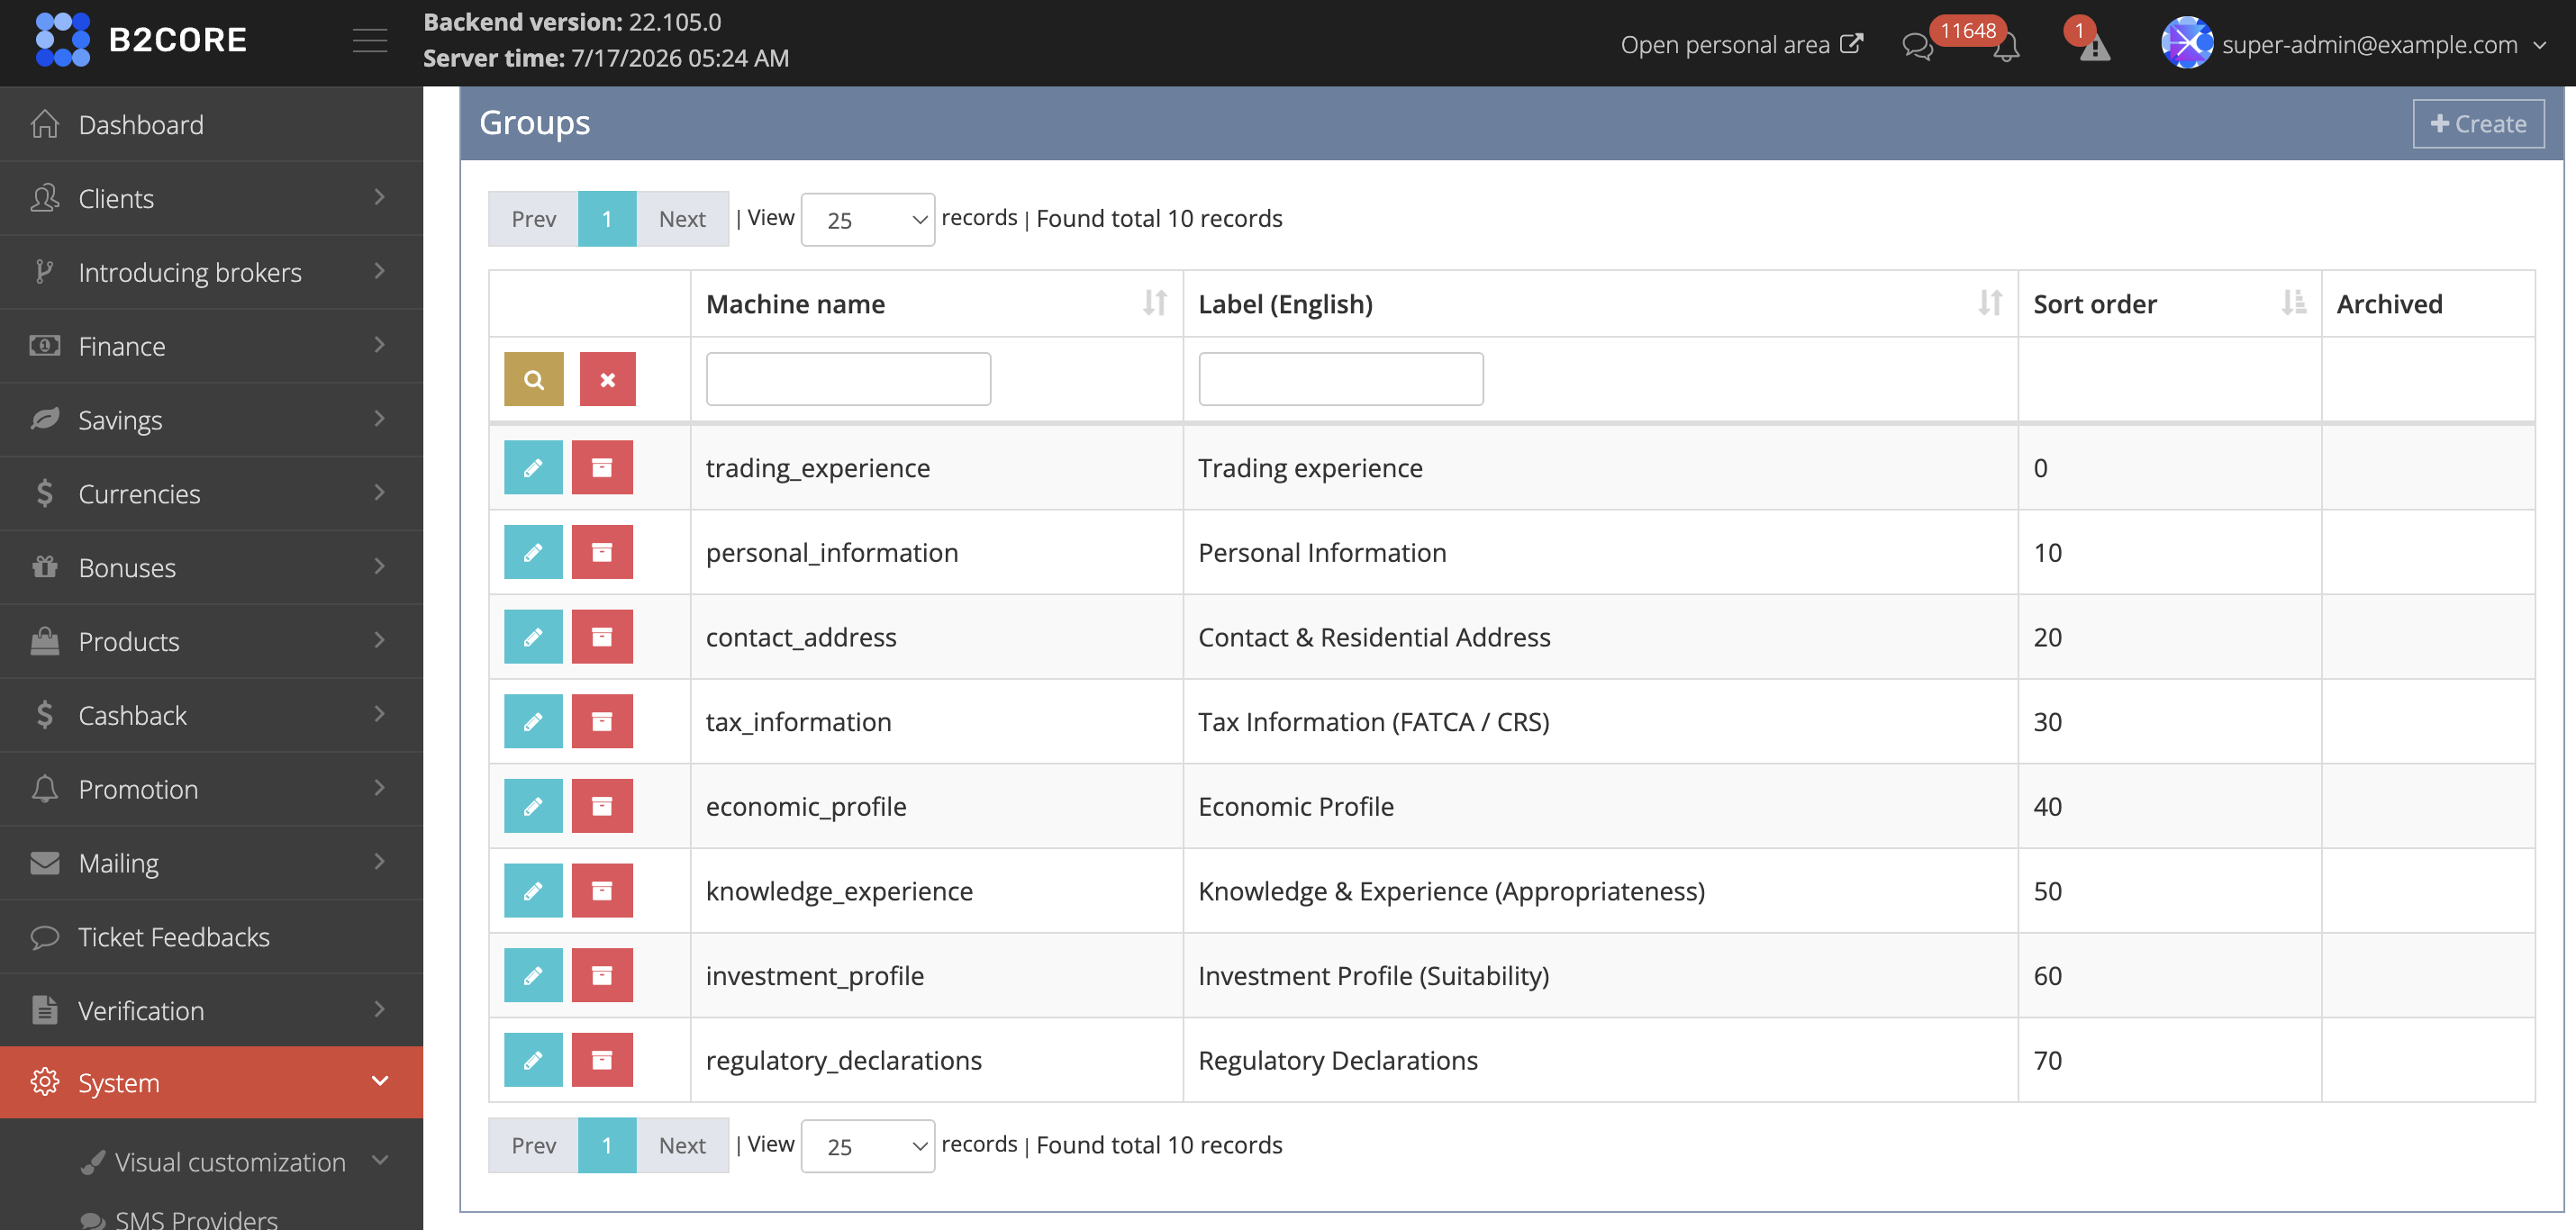
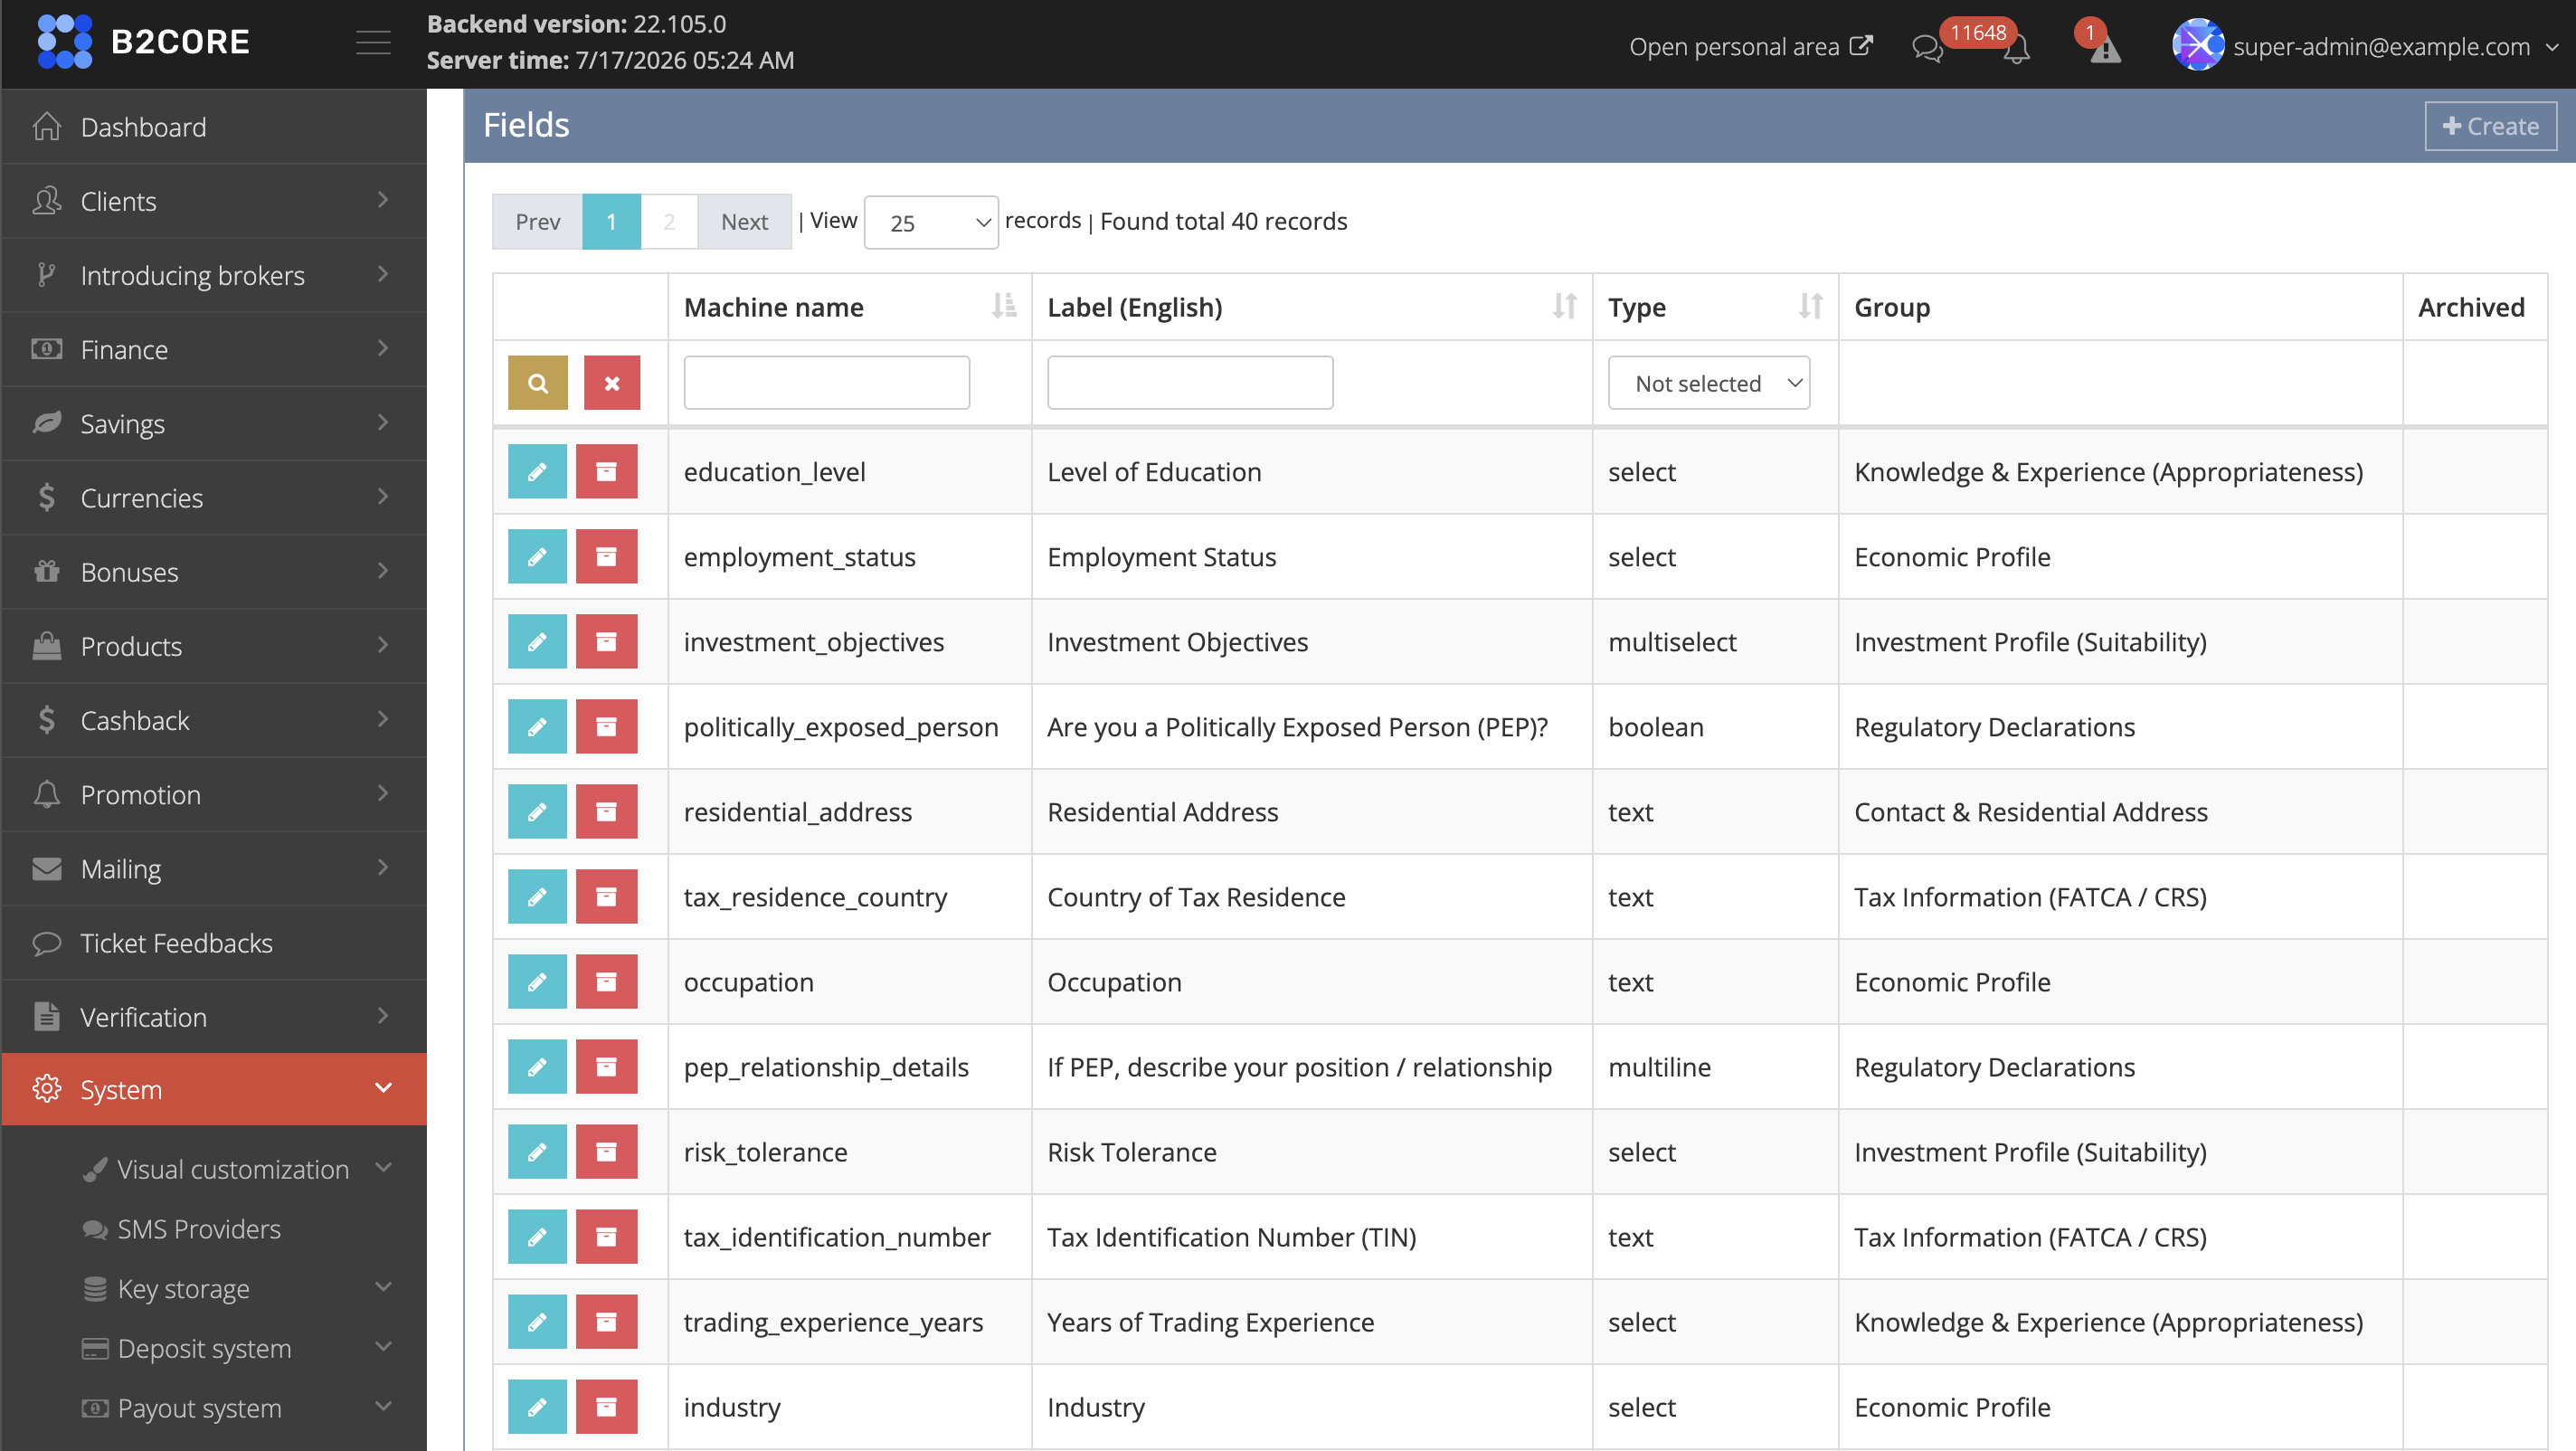
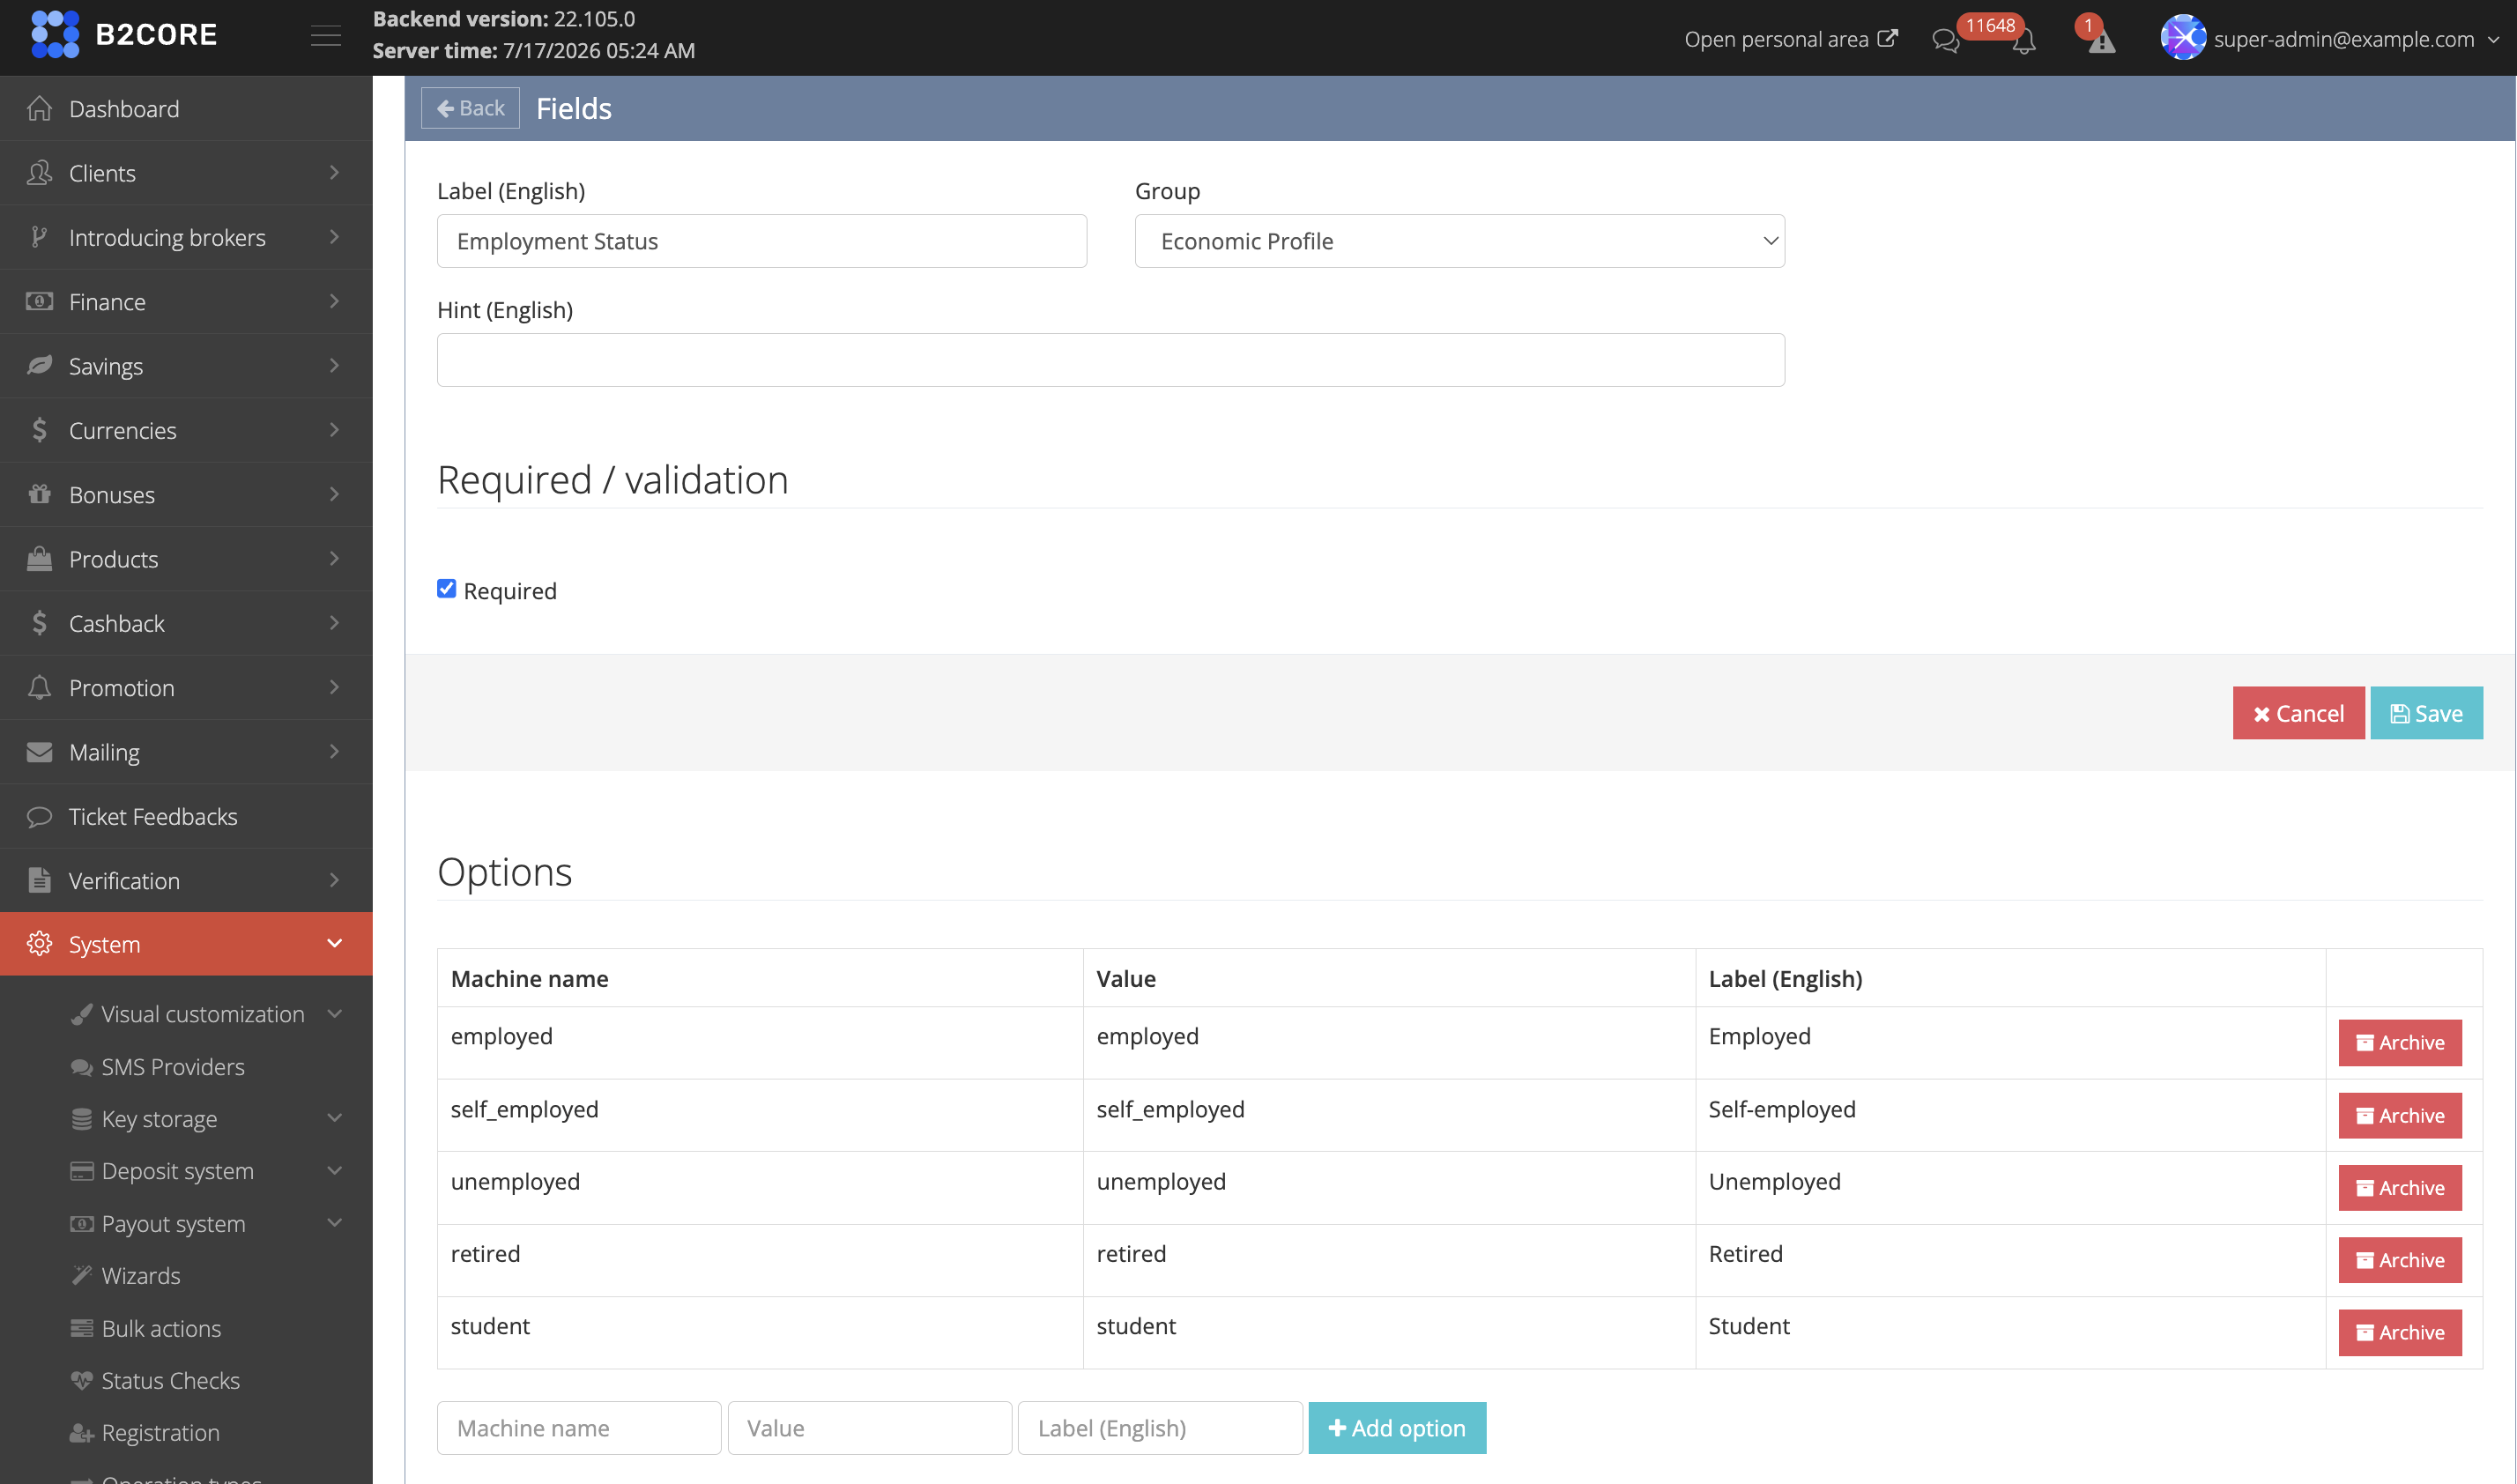
To add a field, click +Create on the Fields page, then enter the label, select the group, set validation rules such as Required, and, for select fields, add the options that clients choose from.
For details on creating and managing custom fields, refer to Custom fields.
Step 2. Create a registration profile
To create a registration profile:
Navigate to System > Registration.
Click +Create in the upper-right page corner, then select the profile type to create, such as an individual registration profile.
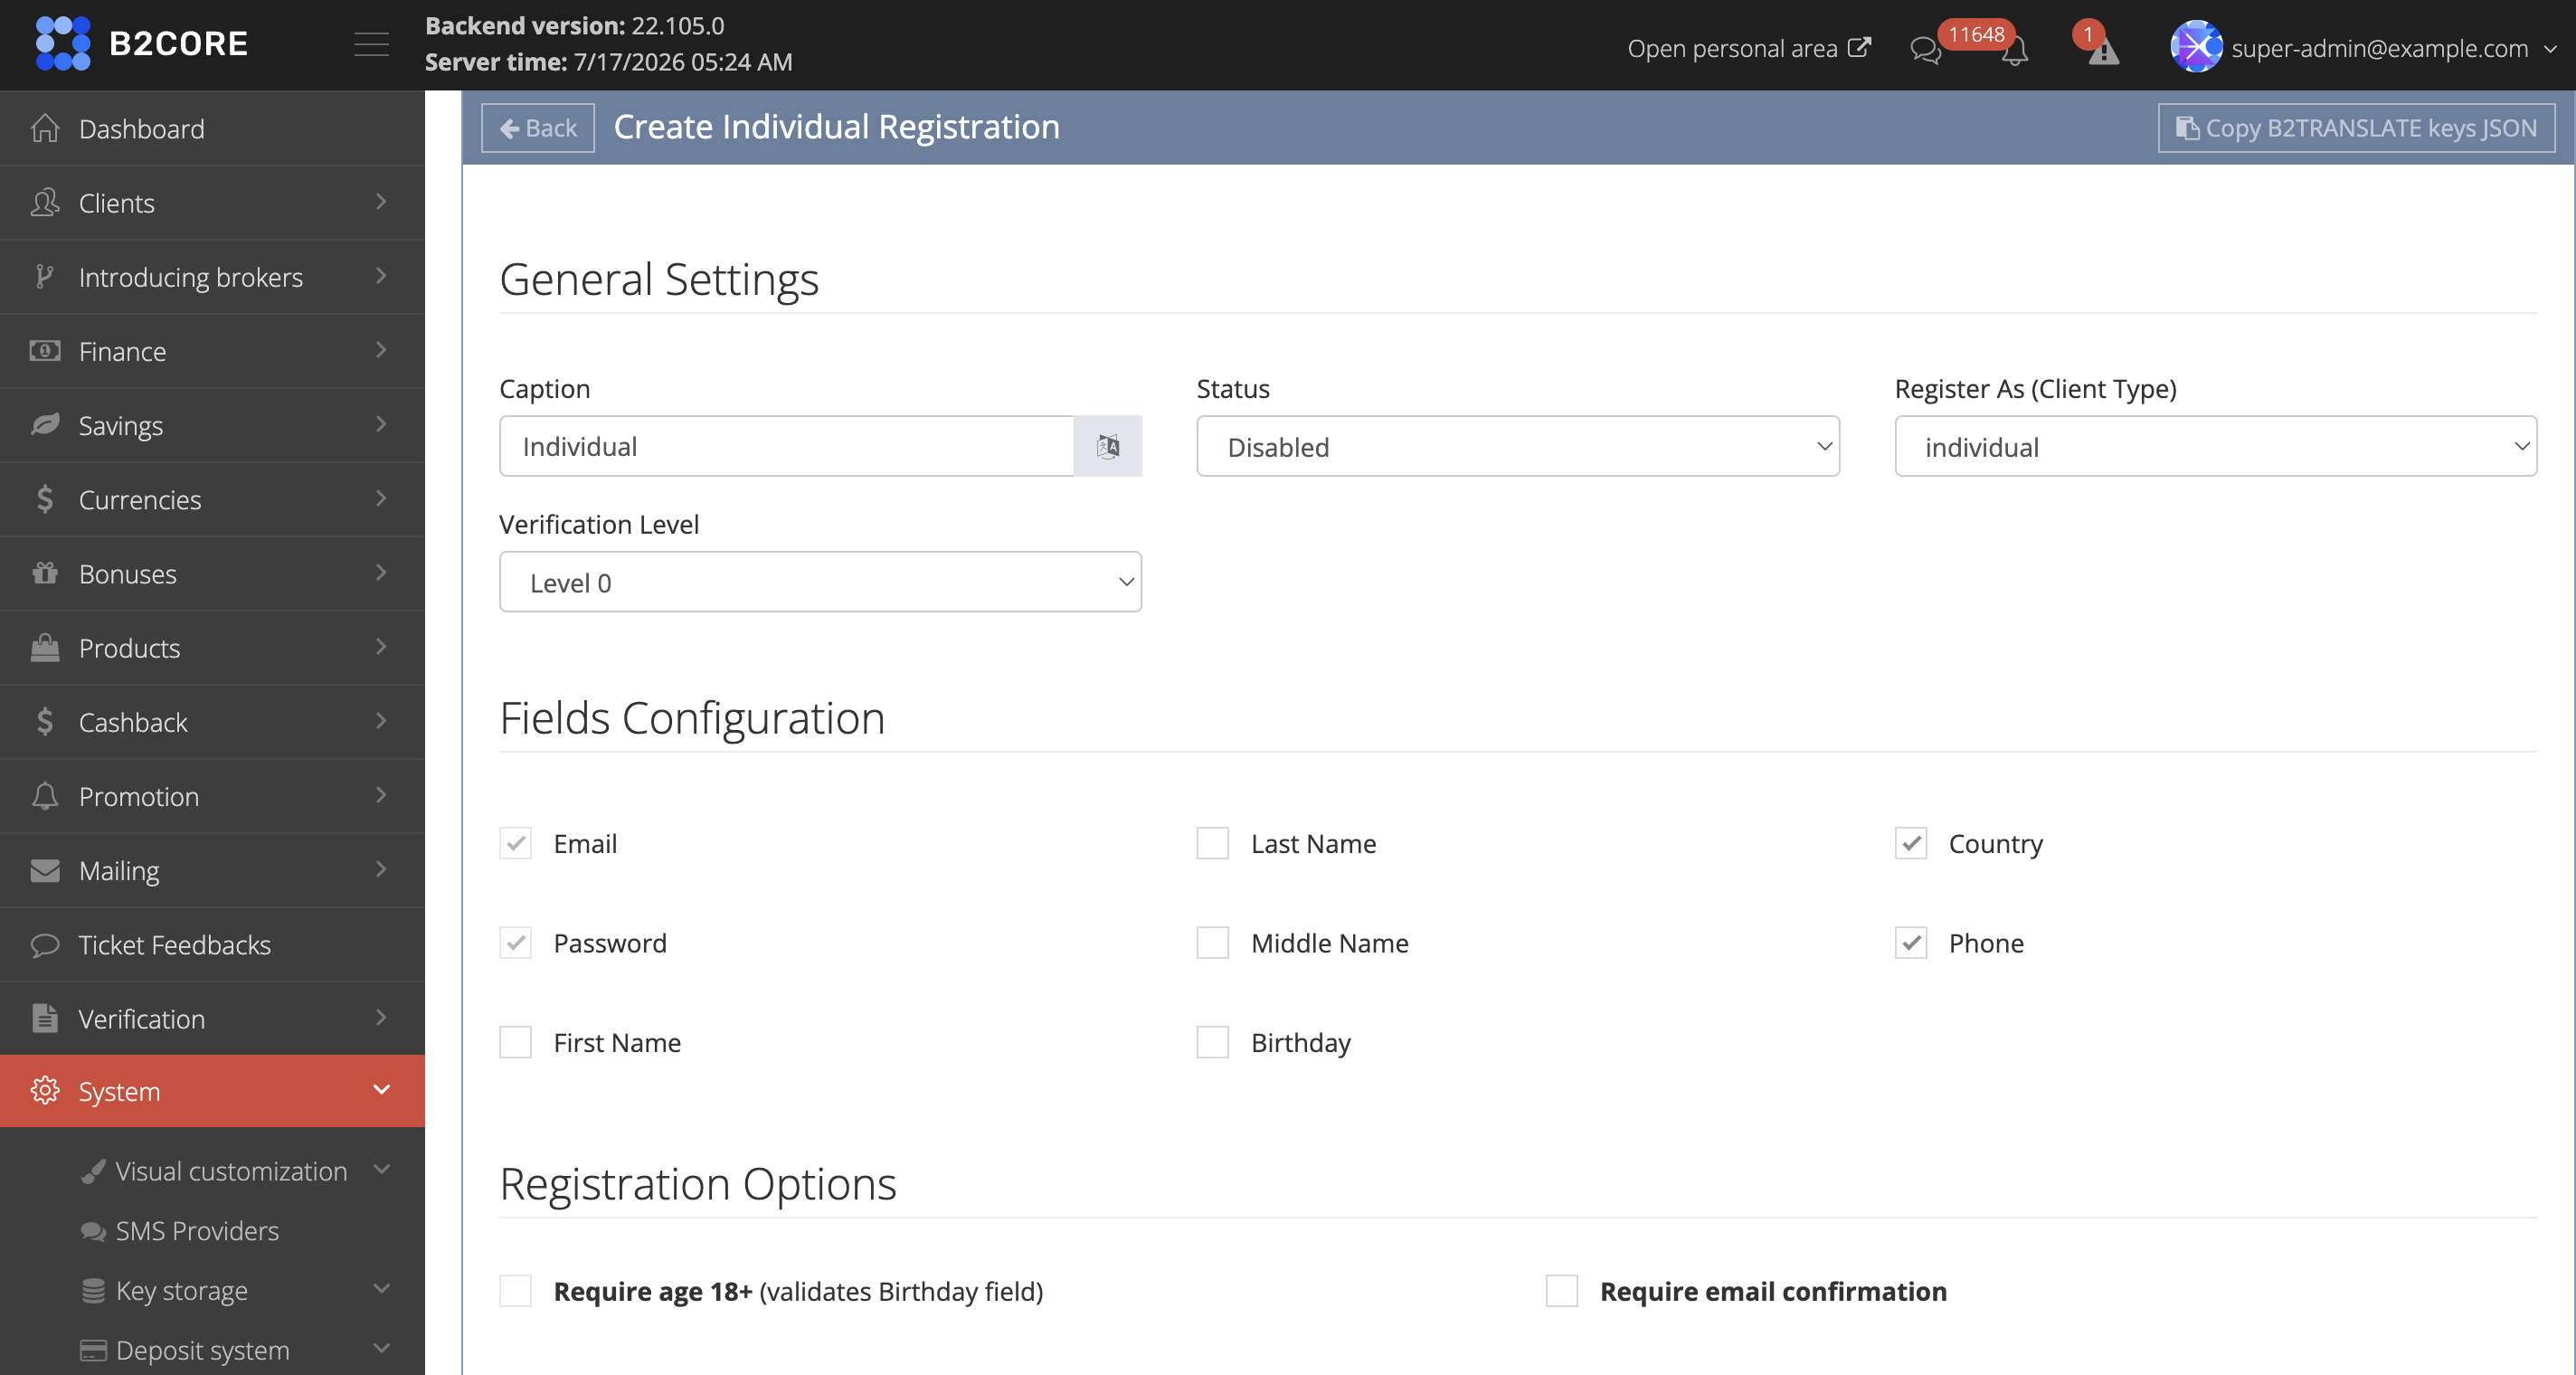
In the General Settings section, fill in the following fields:
- Caption — the profile name displayed to clients as the registration option on the Sign up page in the B2CORE UI.
- Status — set to Enabled to make the profile available on the Sign up page, or Disabled to hide it.
- Register As (Client Type) — the client type assigned to clients who register through this profile, such as individual or corporate.
- Verification Level — the initial verification level assigned to clients after registration.
In the Fields Configuration section, enable the standard fields that clients fill in during registration, such as Email, Password, First Name, Last Name, Country, and Phone, and disable the fields you do not need.
In the Registration Options section, select the options to apply, such as Require age 18+, which validates the Birthday field, and Require email confirmation.
In the Terms & Conditions section, click +Add Term to add each agreement that clients accept during registration, then set its translation key and fallback caption. The fallback caption supports links, so you can point clients to a Customer Agreement or another document.
In the Custom Fields section, select the custom fields to show in the registration form.
- By default, custom fields are displayed on multiple pages, grouped by the groups you set up in Step 1.
- To show all custom fields on a single registration step, select Don't split fields by groups.
To show a custom field only when another field has a specific value, use the Conditional Display section. Click +Add Rule, select the field to show, the field to check, and the value that triggers it. Both fields must also be selected in the Custom Fields section.
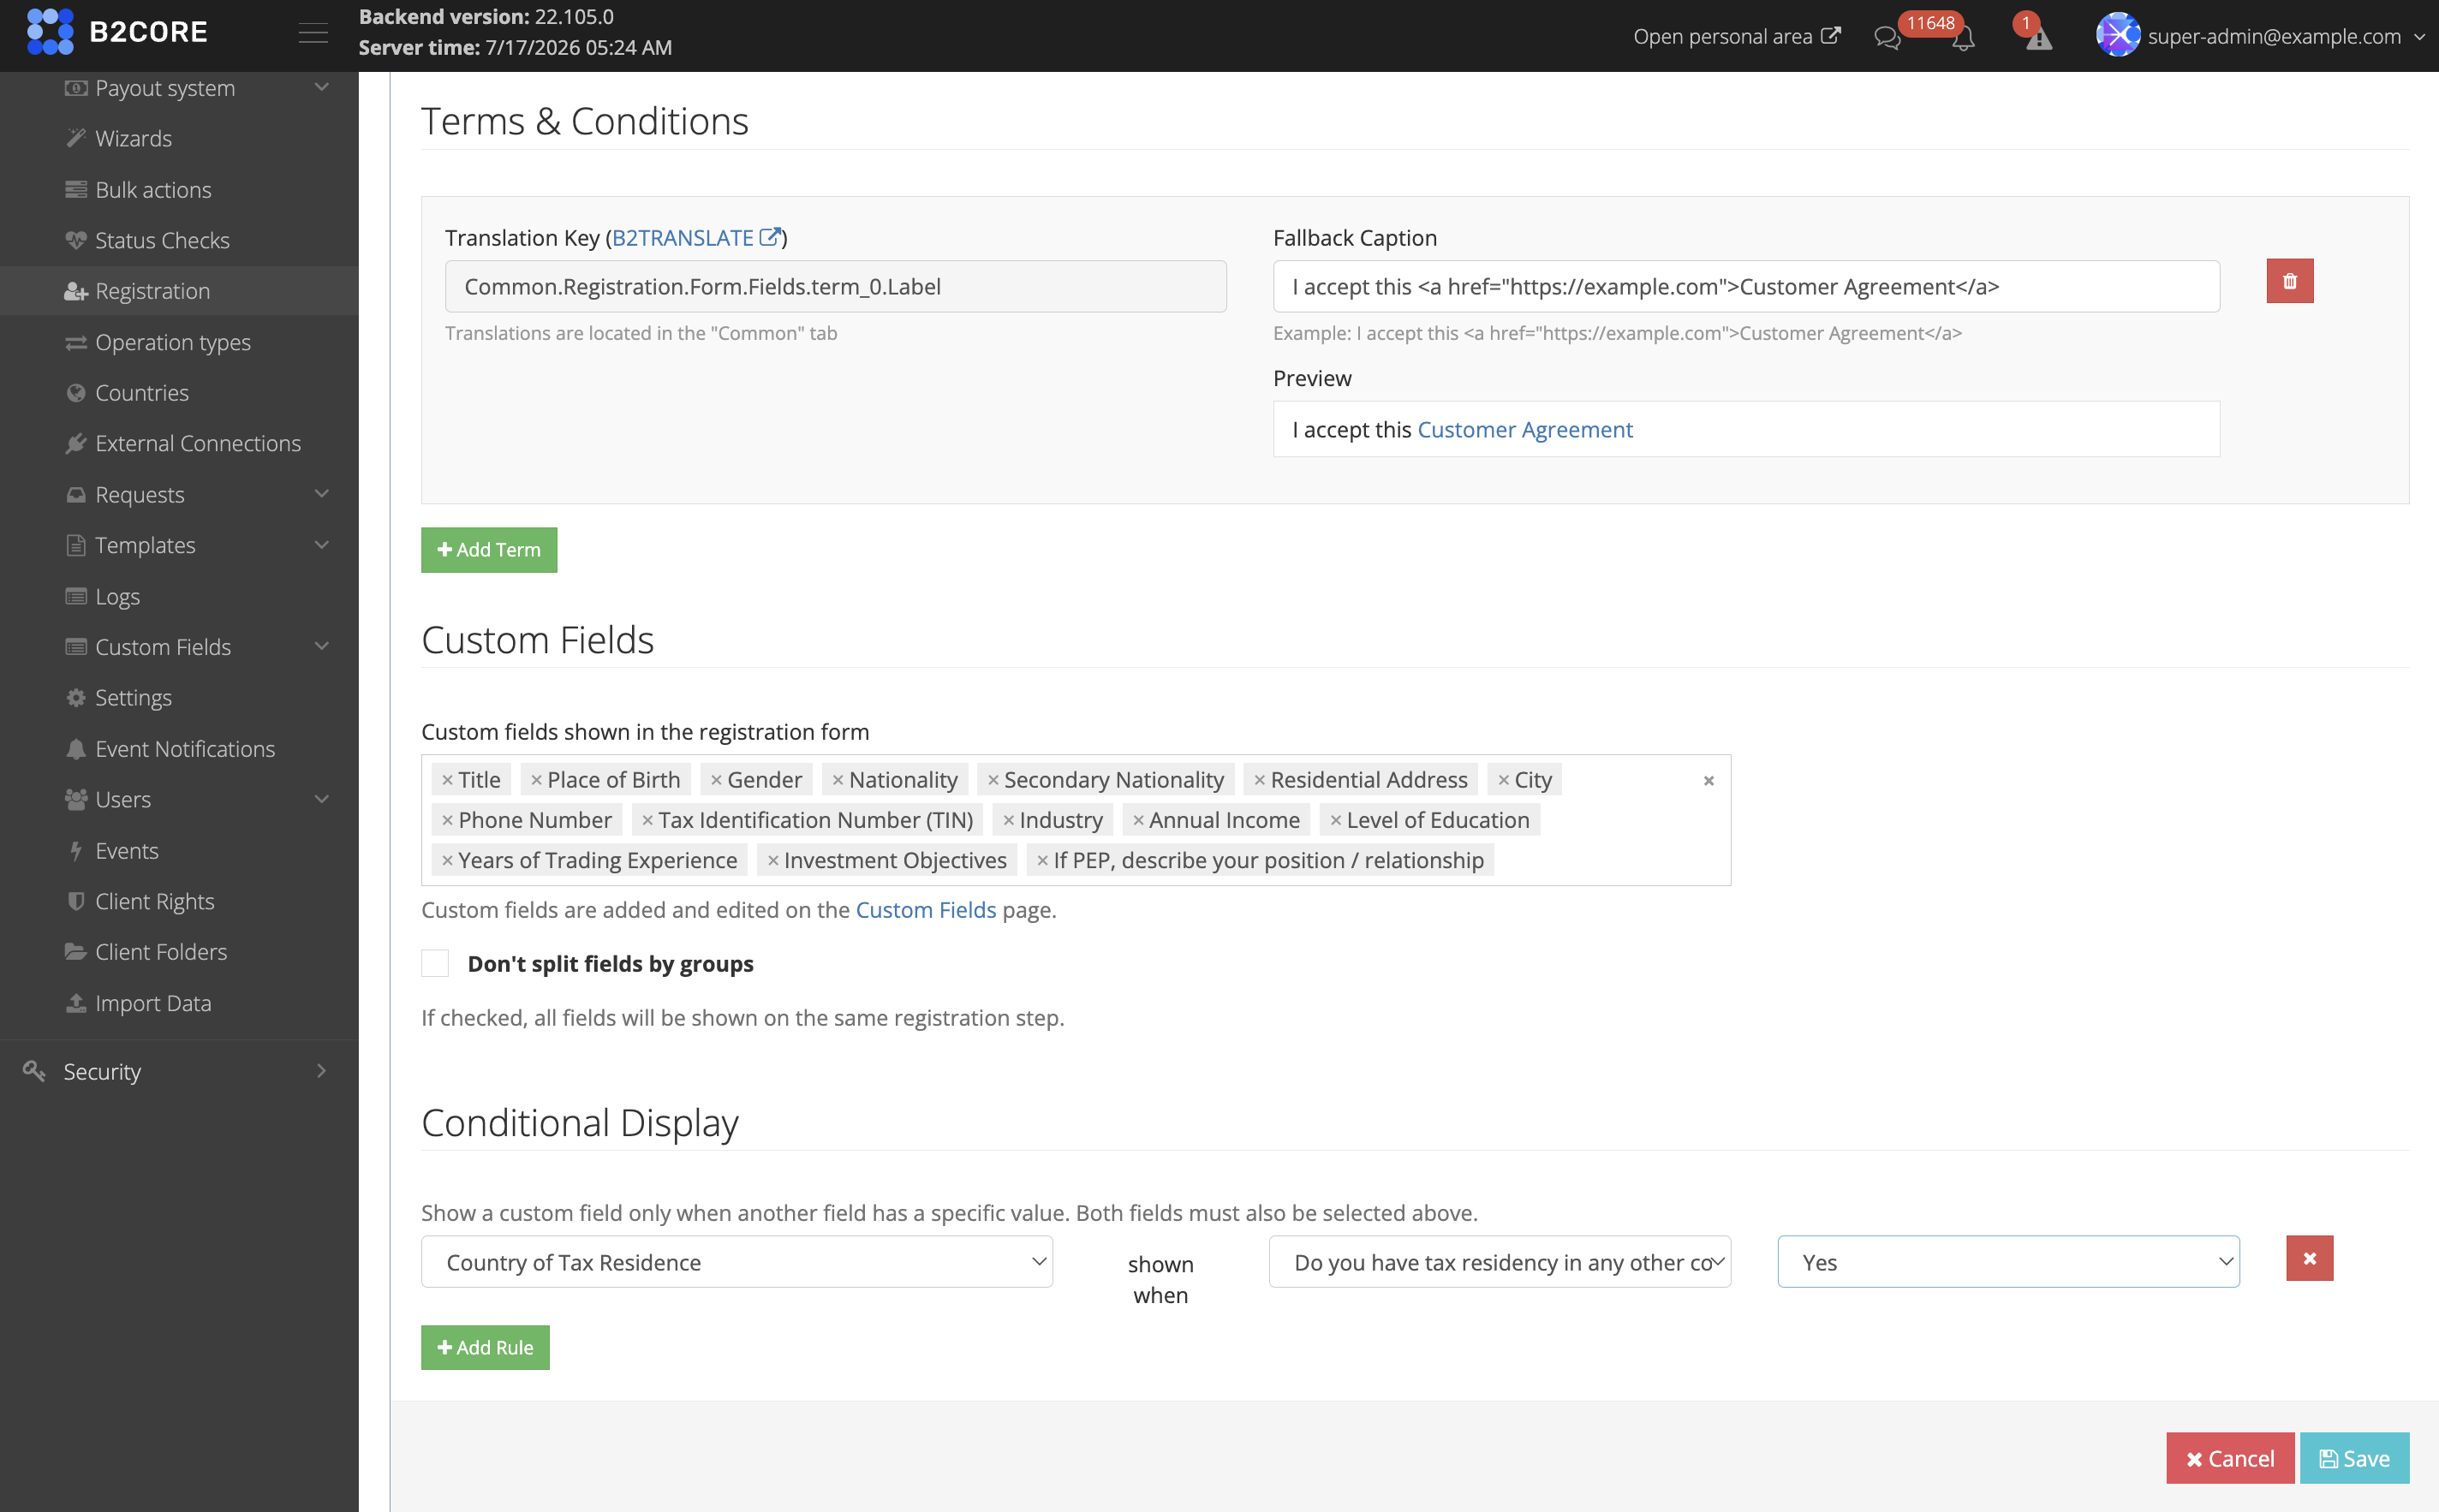
Click Save to create the registration profile.
Localize fields and terms
Fill in all captions, custom fields, and terms and conditions in English first, then translate them into the languages you support in B2TRANSLATE.
To transfer the translatable keys to B2TRANSLATE, click Copy B2TRANSLATE keys JSON in the upper-right corner of the registration profile page. The button copies the translatable keys for all custom fields and terms and conditions in the profile as JSON, which you then paste into B2TRANSLATE to translate into every language you need.
Step 3. Verify the registration process
After you set the profile status to Enabled, the corresponding registration option is displayed to clients on the Sign up page in the B2CORE UI. Complete a test registration to confirm that the fields, options, and custom fields behave as expected.
The values that clients fill in for custom fields are available for each client in the Clients > client profile > Custom fields tab in the B2CORE Admin Panel, where an admin can also view and edit them.
Keep the existing Registration wizards enabled until you no longer support the older mobile app versions. For details on the previous approach, refer to How to set up the Registration wizard.
See also
Zuletzt aktualisiert am